
1). Identify all boxes/packages
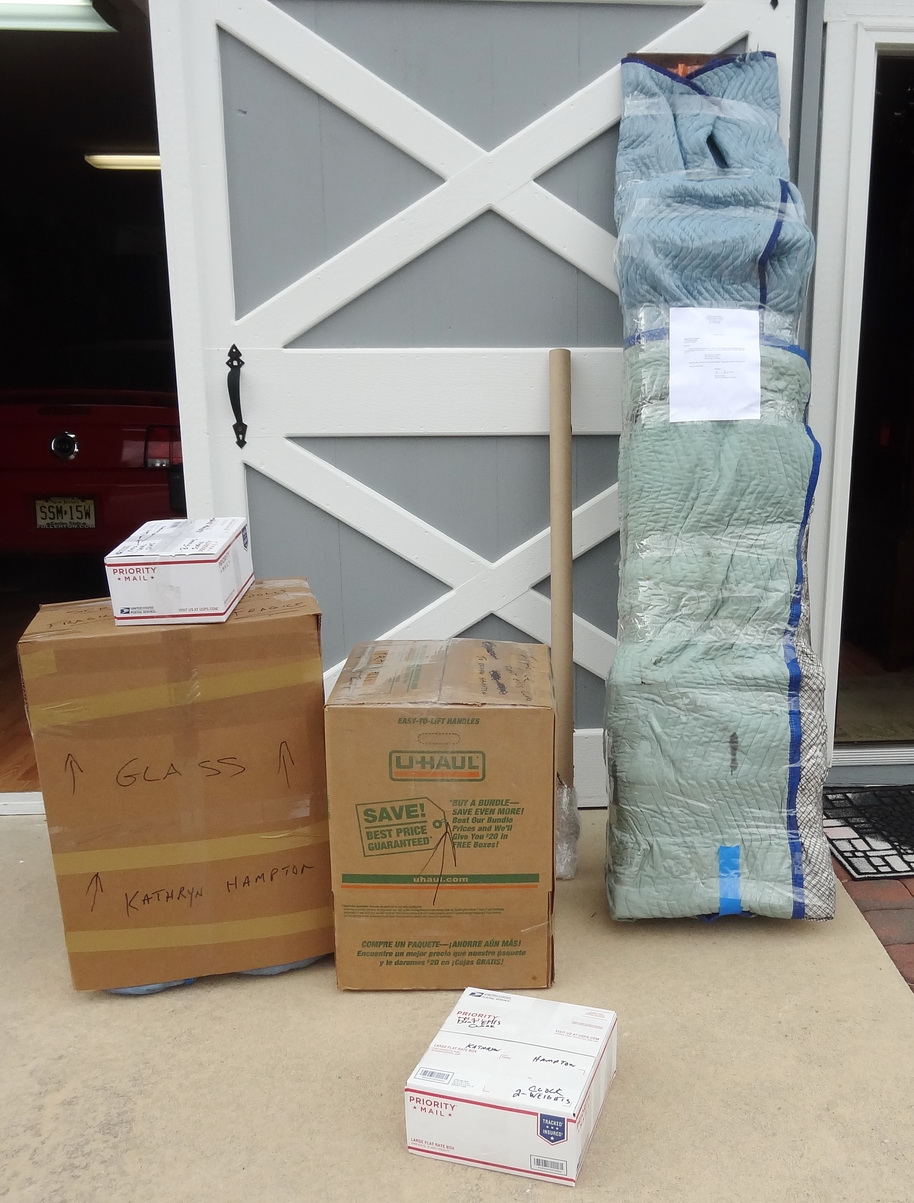
Identify all of the parts of the clock: Case/Trunk, Bonnet (large brown box), Clock Works (smaller brown box), Weights (larger white box… heavy one), pendulum (cardboard tube), Misc parts… small white box. TOTAL of 6 pcs
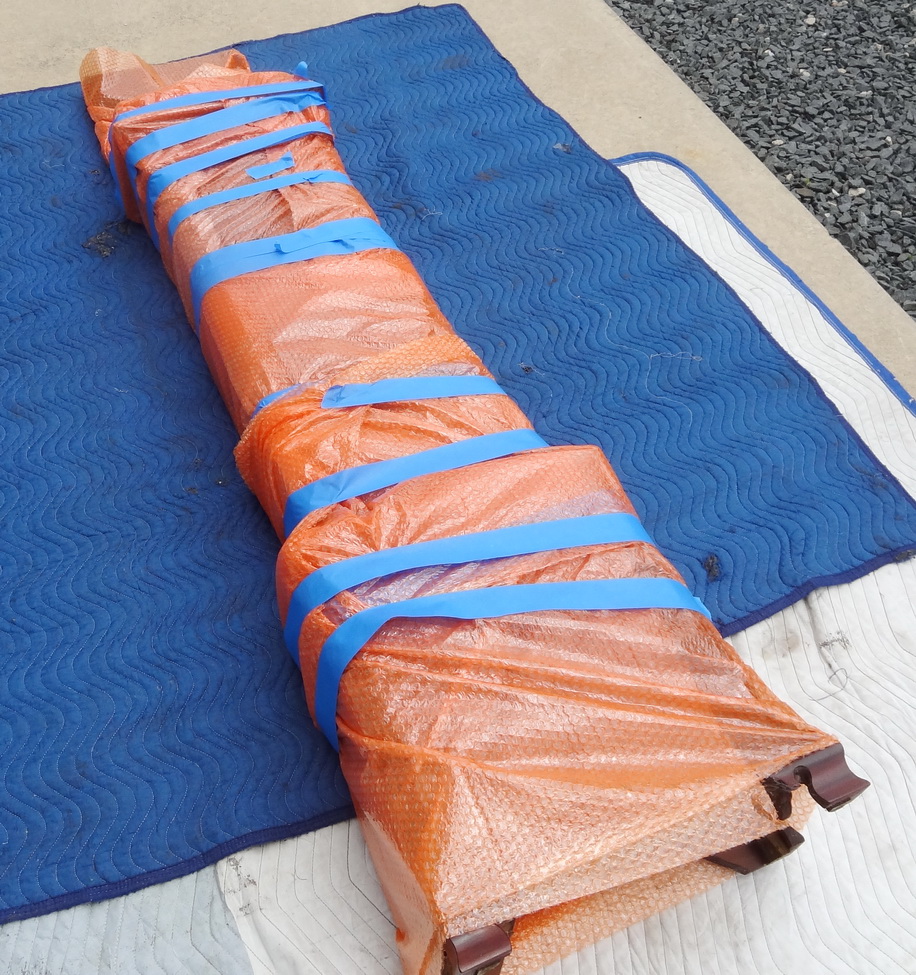
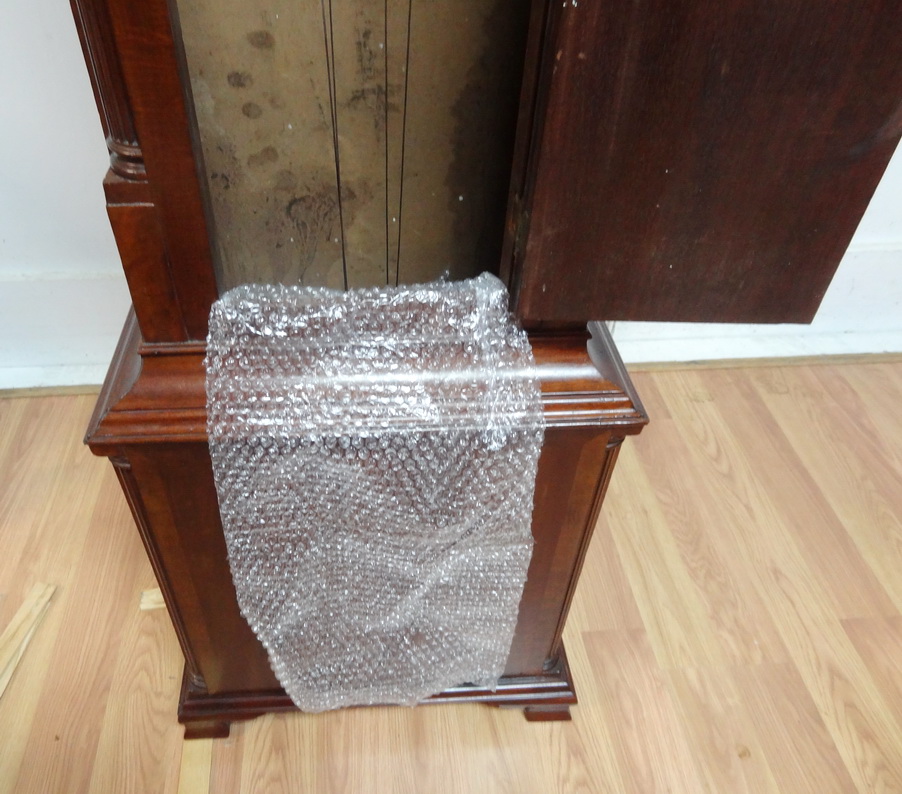
Remove the outer blanket, then the inner bubble wrap very carefully !
2. Unpack/Unwrap… Carefully remove the tape
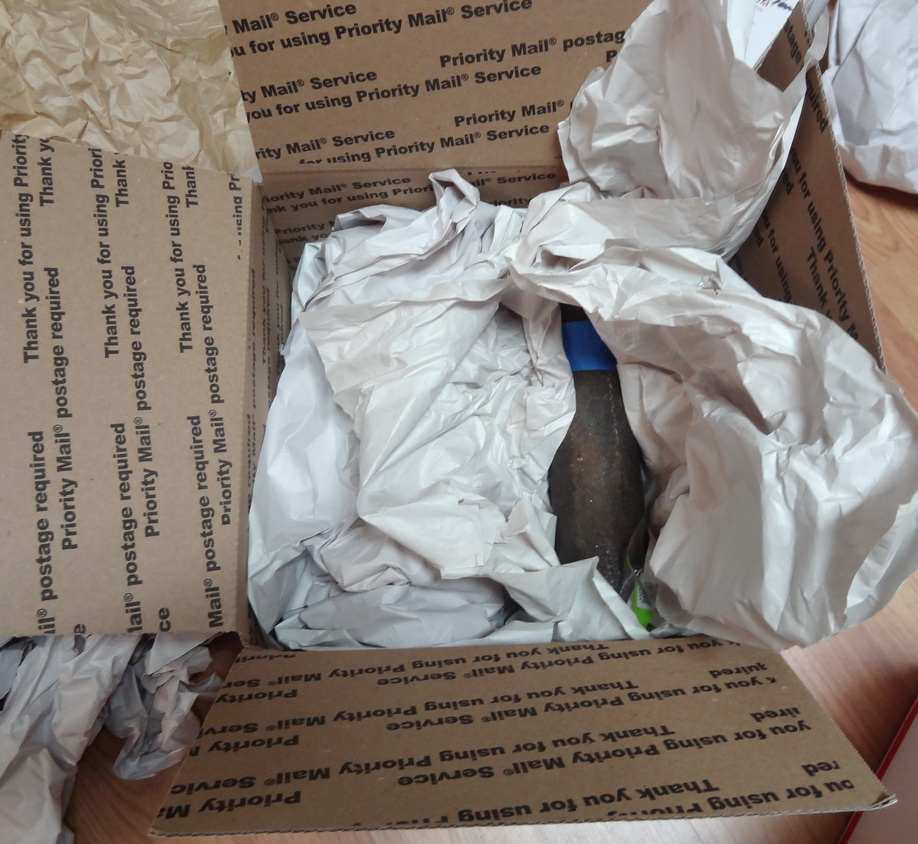
The heavy white box has the weights. Unpack the box and remove the weights
Pendulum inside tube. Remove the bubble paper from the one end, then slide the pendulum out of the tube. Always handle the pendulum by holding the heavy end (bob).
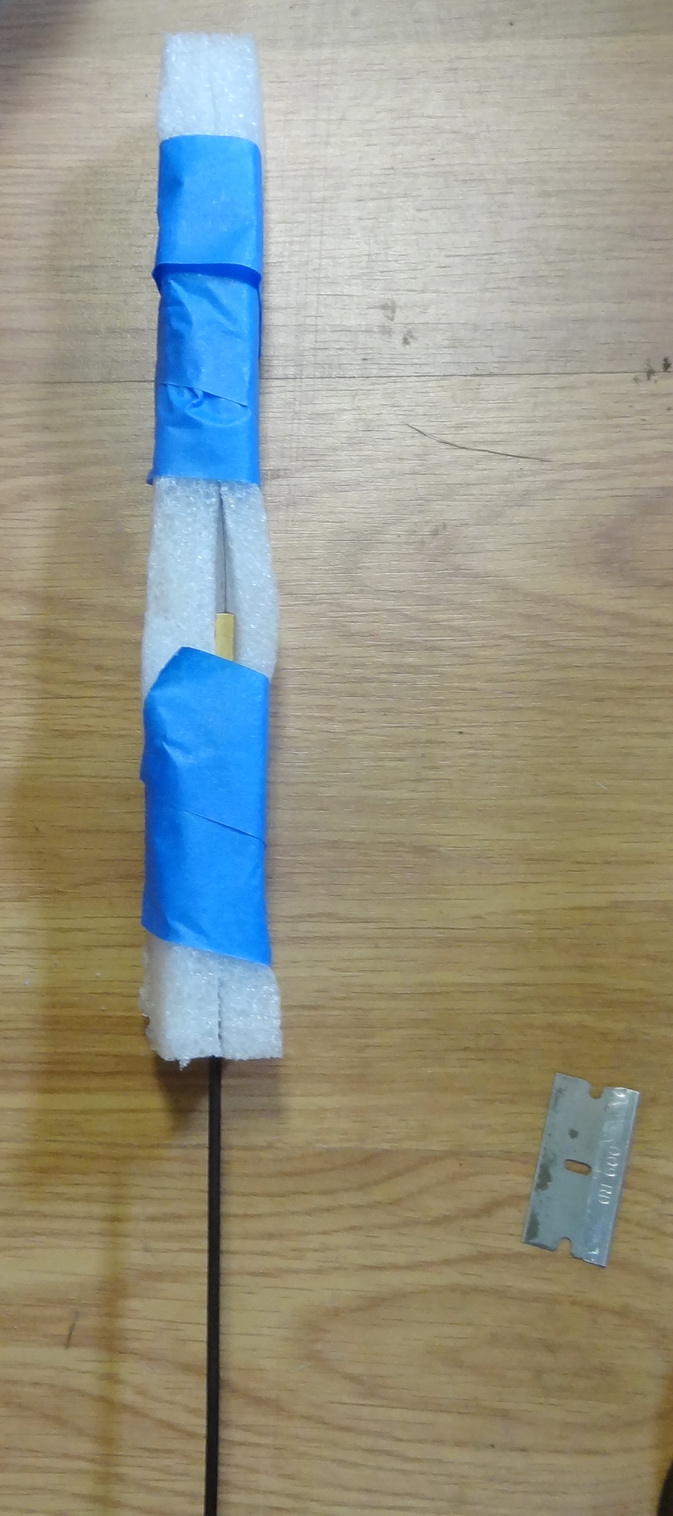
After removing the pendulum from the tube, carefully remove the protective foam/tape that protects the suspension spring. Do NOT try to tear this with your hand. Use a single edge blade to carefully slice the edge of the taped surface and then separate the foam from the spring. Don’t bend or apply any force to this end !
The tube has the pendulum inside. Remove the bubble paper from the end of the tube and carefully remove the pendulum. Make sure you don’t bend the shaft. Always handle the pendulum from the heavy/bob end. The opposite end has the suspension spring. This has been protected and you need to very carefully remove the packing. With a single edge blade, carefully cut the tape and separate. Do NOT pull/remove the tape by hand as you will bend/damage the spring
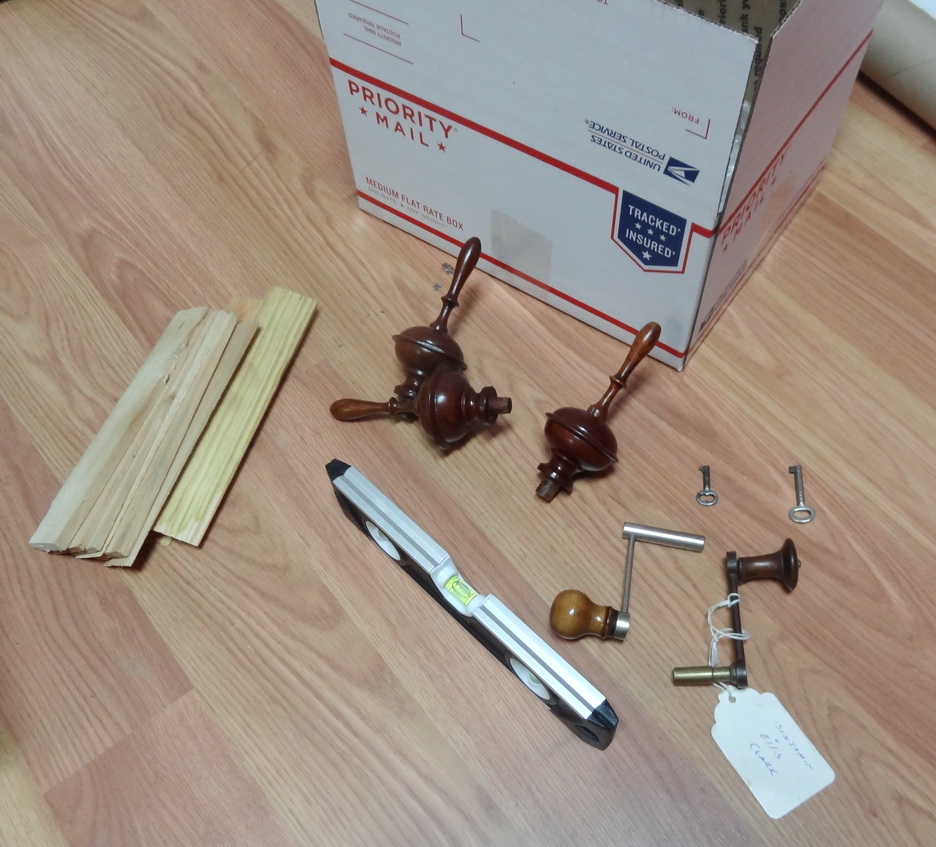
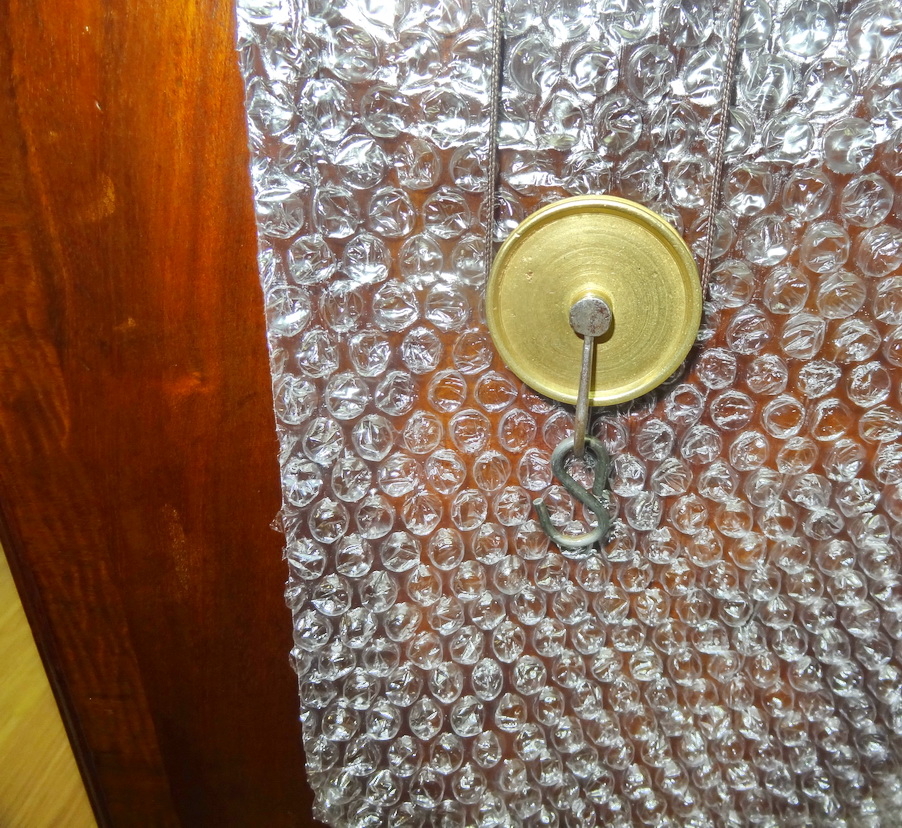
The box with the parts/finials/level/shims/keys. The box with the bonnet has internal packing to protect the scrolls and the glasses (front, sides). Note there is a front side with scrolls and a back side. Make sure you open the packing with the front side up (door glass and scrolls facing you). Carefully remove the packing material. After the bonnet has been unpacked, set it aside so it is standing up and out of the way.
The Uhaul box with the clock movement can be opened at this time, but leave the movement inside the box until you are ready to put it in the case
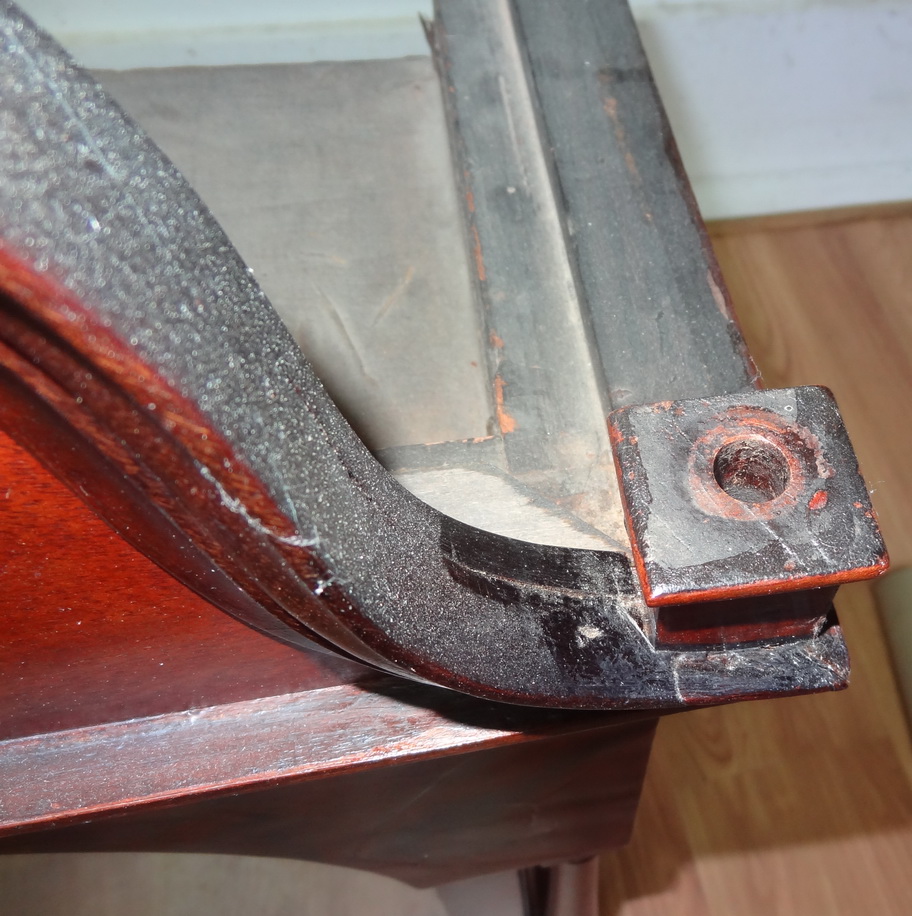
3). Place the case into position

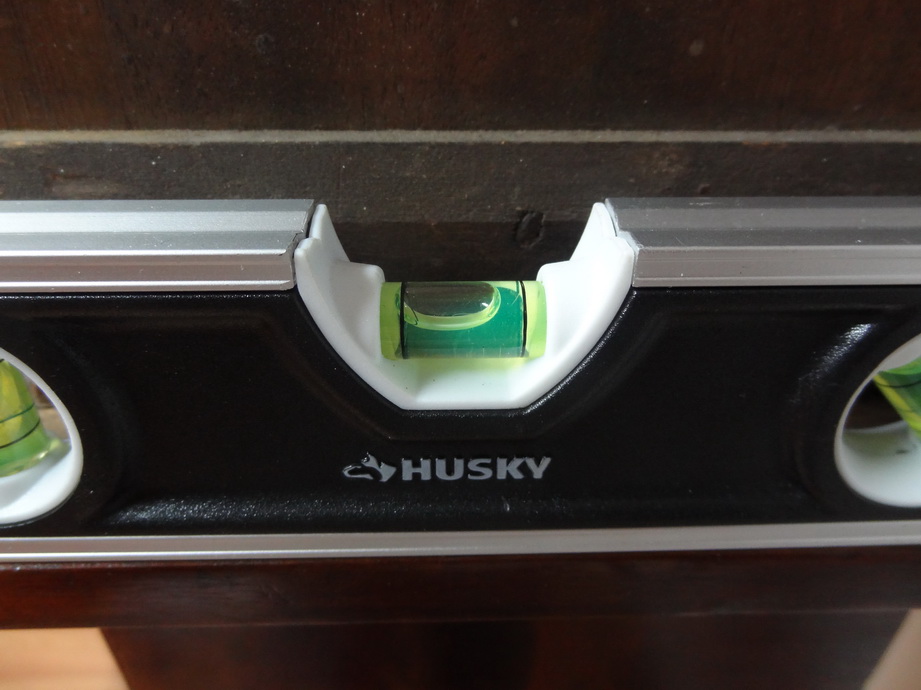
Place the case in the desired location. Then place a level on the front molding as shown and note the position of the level.
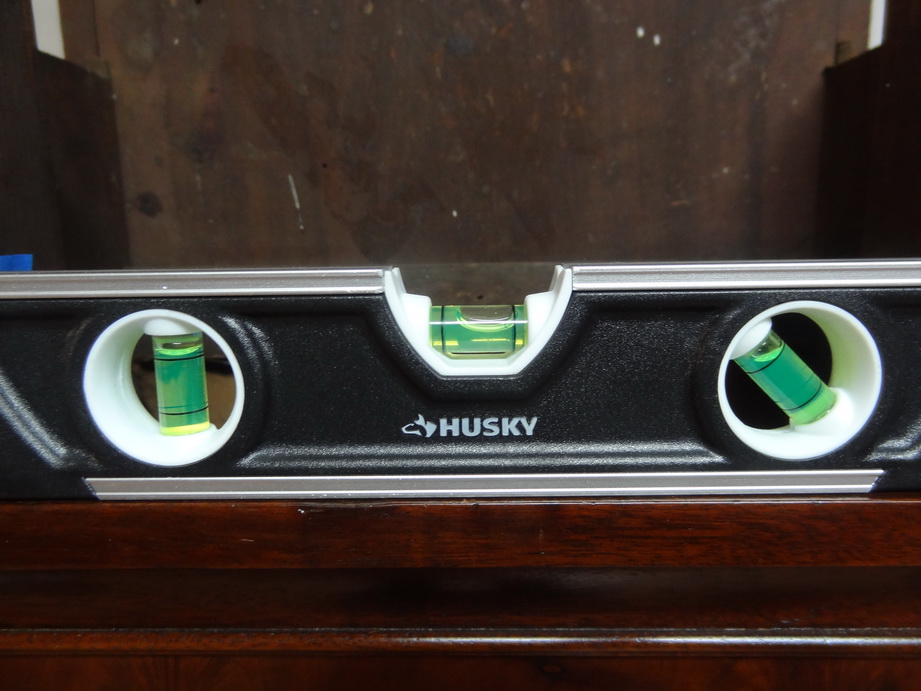
If the bubble is NOT in the center, use the shims to level the case. If the bubble is offset to the right – use shims on the LEFT front and rear foot to balance. If the bubble is offset to the left- use shims on the RIGHT front and back foot to bring the bubble in the center.
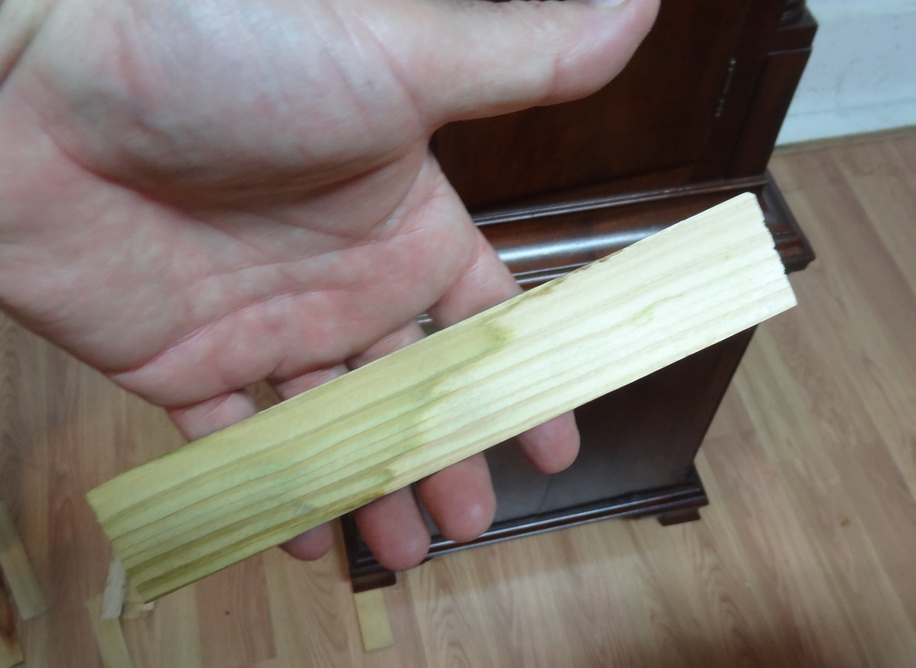
Add shims as needed…. In this example the bubble is offset to the right so I will add shims on the left
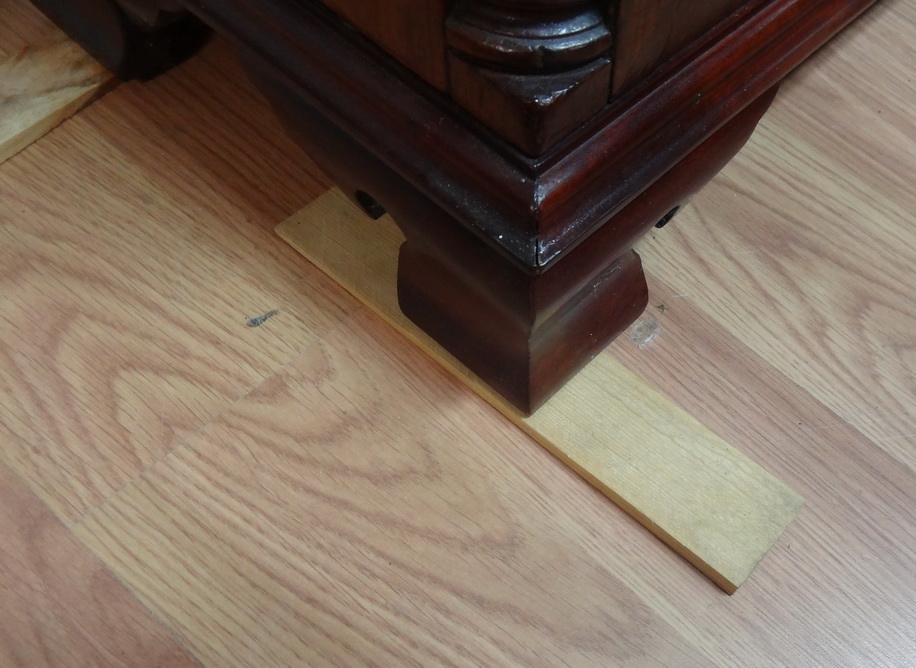
The shims are tapered to allow you adjust the case. The front and back shim need NOT require the same amounts. The key is stability and the case does not rock, and level.
After you have confirmed that the bubble is in the center of the two reference lines, check the stability of the case…make sure it does not rock
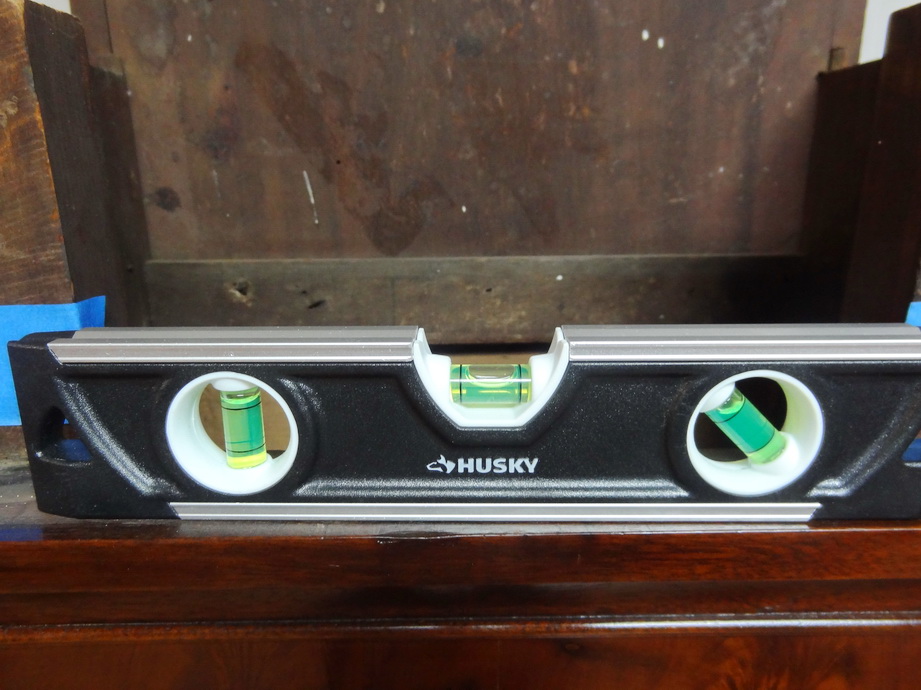
The bubble is centered after shims/level adjustment

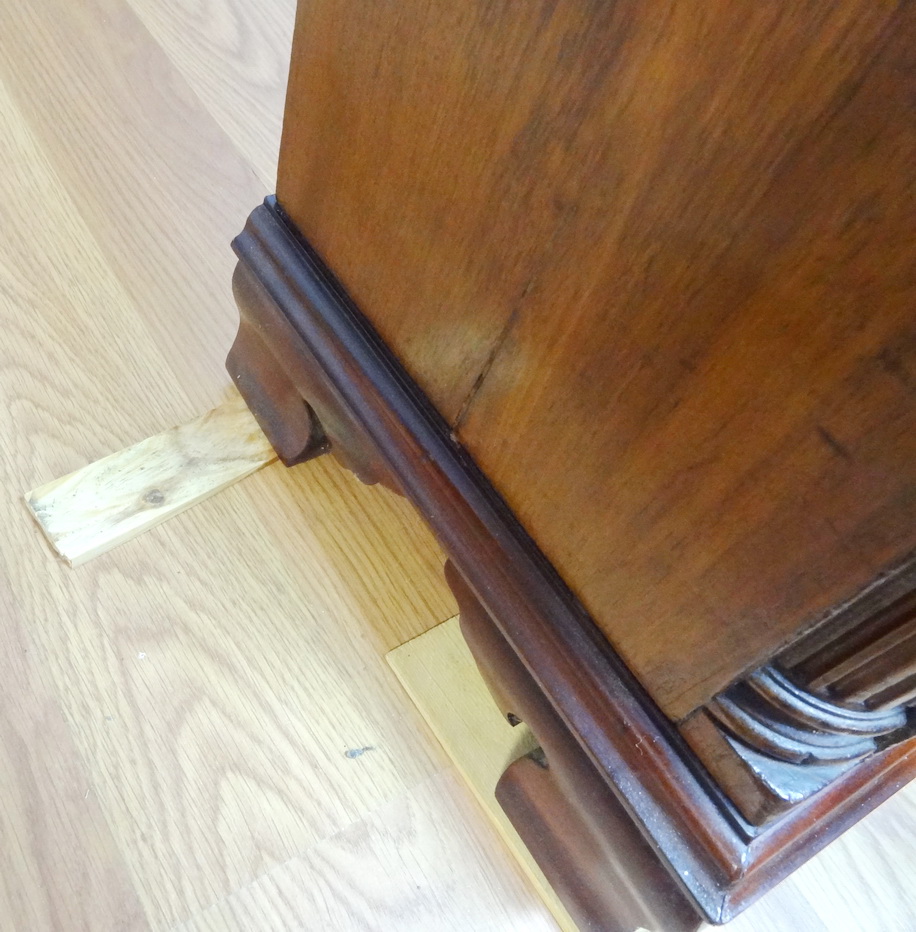
Next step is to check the front to back balance/level. Place the level on the side molding of the case. In this example, the level is on the right side molding. This picture is taken from the right side of the case. NOTE the bubble is on the left side of center !
Side view of level/bubble on right case molding. This photo taken from right side. Note that the bubble is on the LEFT line. This means the case is slightly leaning back which is a GOOD thing and will insure proper clearance of the weights with the front of the case. You do NOT want to have the offset any more than this. It could be a little less. Under NO circumstances do you want 44). the bubble near the RIGHT line
4). Place the movement inside the case
Open the box with the clock movement and carefully remove the top layer of packing. You will note the movement is in a black plastic bag. Don’t pull the movement out by grabbing the top of the dial. Reach into the box and with 2 hands, grab the movement from the seat board (you can feel it with your hands… its a flat board the works are attached to and there is a butt end on each side near the bottom of the works) and remove it from the box. Carefully remove the black plastic bag. Unwrap the cables that are wrapped around the seat board and set the movement into the case.
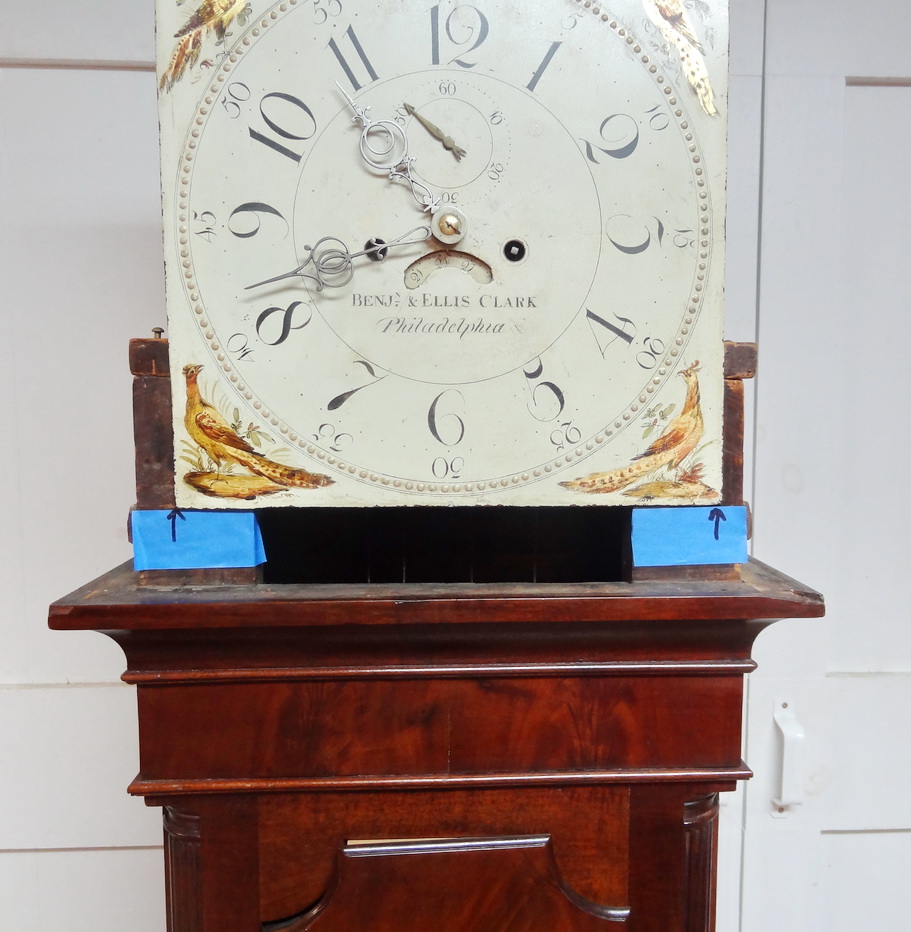
Position the movement in the case. Be careful to let the cords/pulleys drop into the inside of the case. Use the arrows on the blue tape to align the sides of the dial

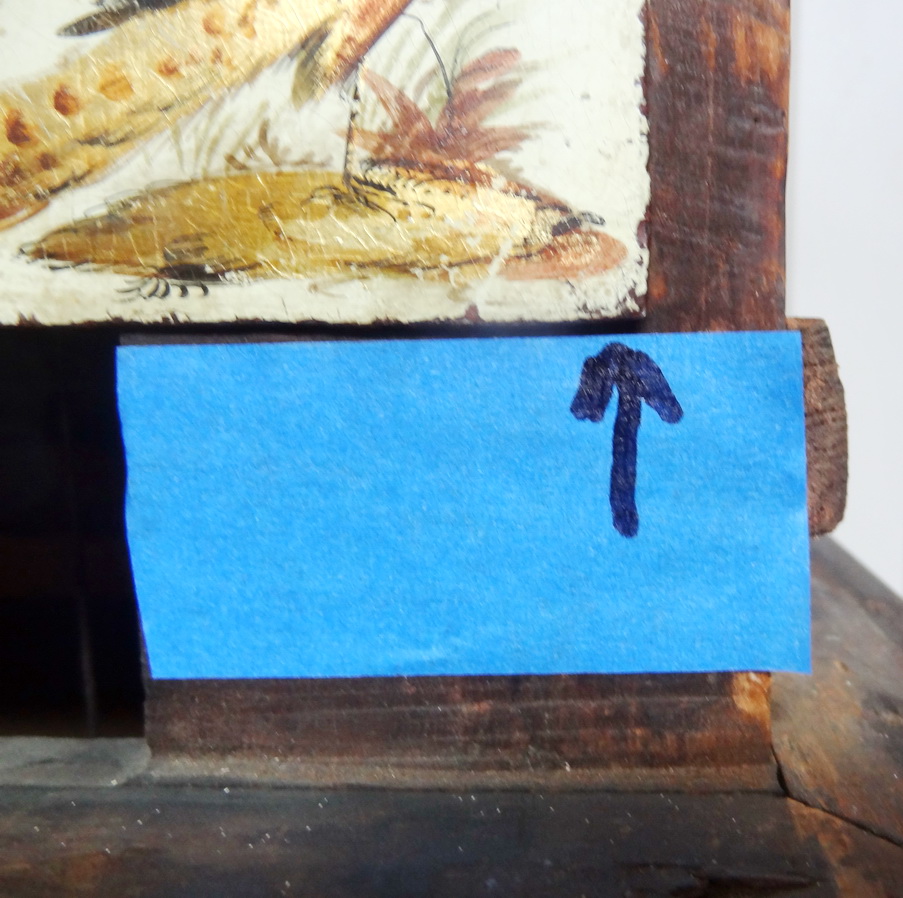
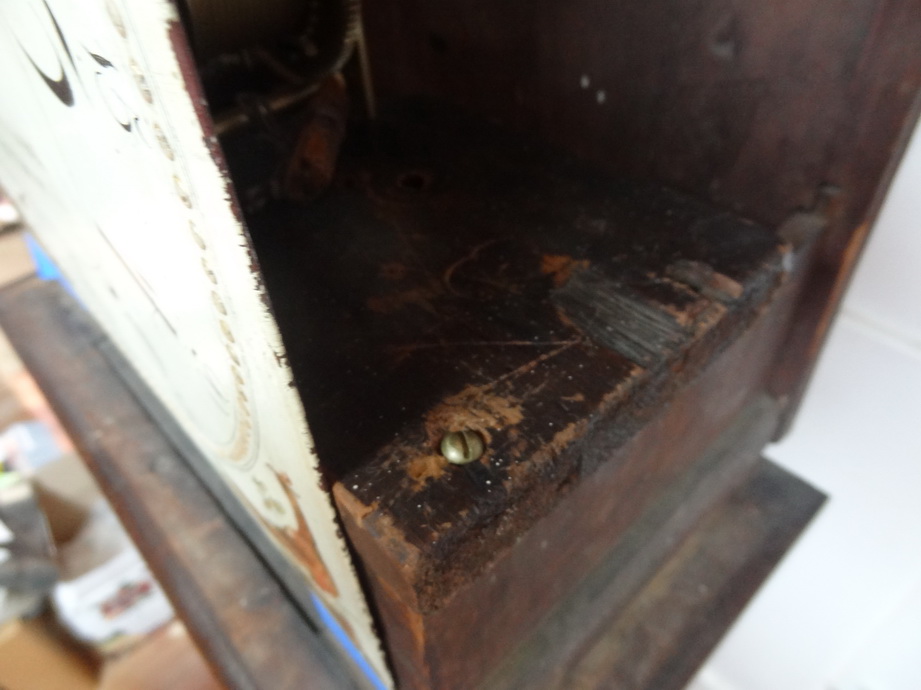
The parts box contains 2 brass wood screws. Use one on each side to secure the seat board of the works to the case. Use the existing holes. Lightly tighten the screws, make sure both are in place/properly aligned before you tighten. After both sides are done, then remove the 2 pieces of blue tape with the arrows.
5). Installing the pendulum
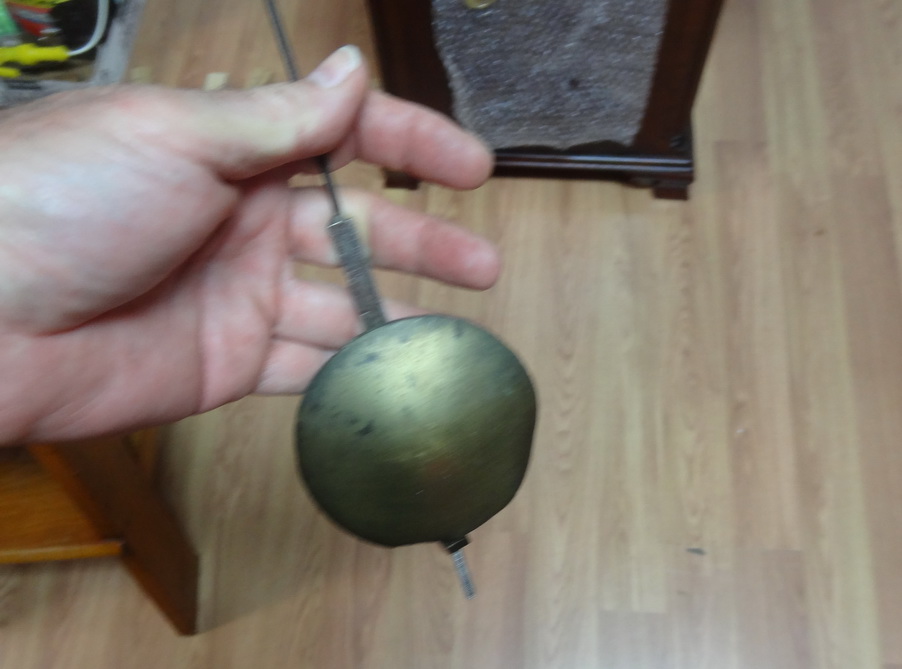
Always support the pendulum by holding the heavy end (bob). You will now install the pendulum and this step requires a lot of care. You must not bend the “spring/feather” end of the pendulum, and you must not bend the metal fork on the back of the clock. The pendulum will be installed through the waist door of the clock
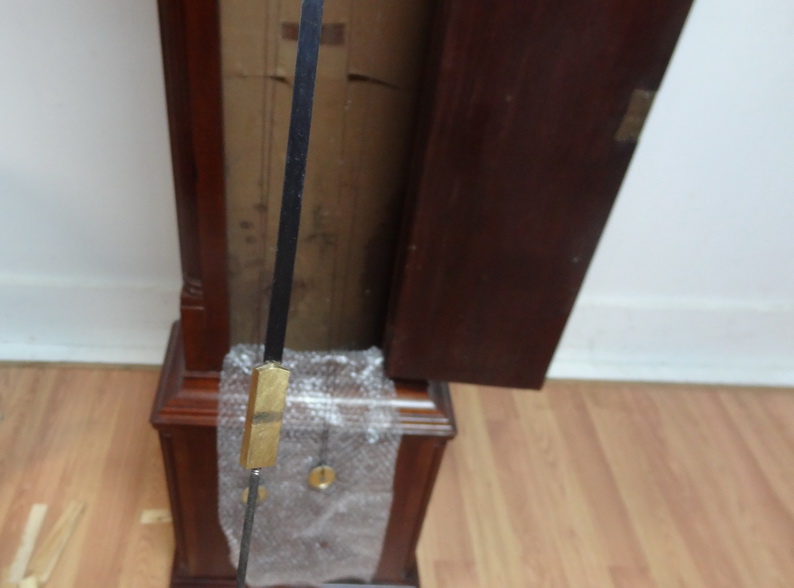
This is the suspension spring and you will put this part in first and carefully thread it into the metal fork on the movement. Be very careful not to put any force on this spring. Don’t bend it
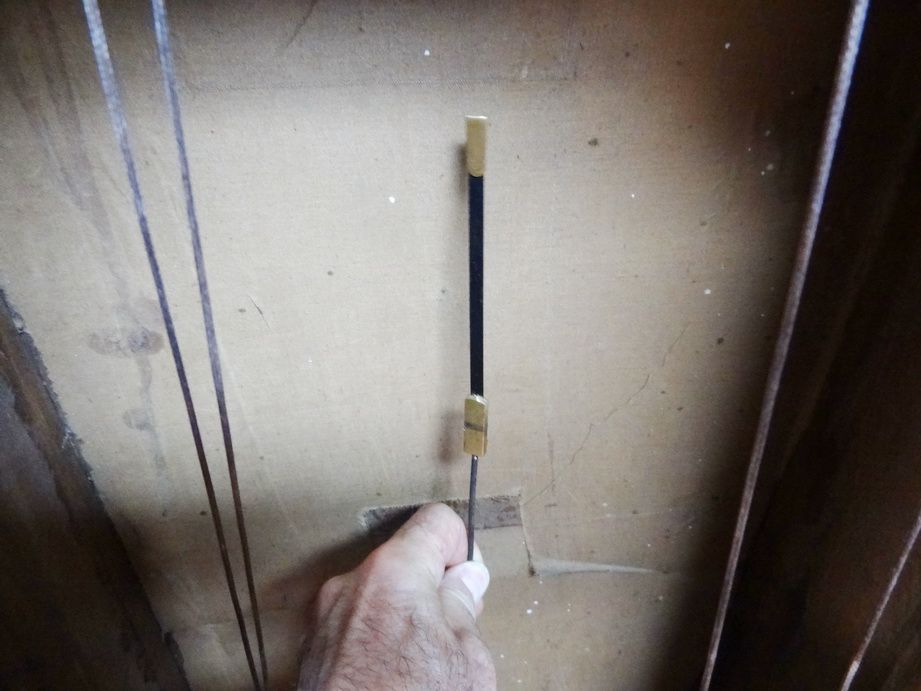
As you put the pendulum into the case support the weight of the pendulum with one hand holding the bob and the other hand guiding the suspension spring. During this step it is recommended that you have a helper HOLD the case….. from the side… One hand holding the case, on hand on the seat board holding the movement
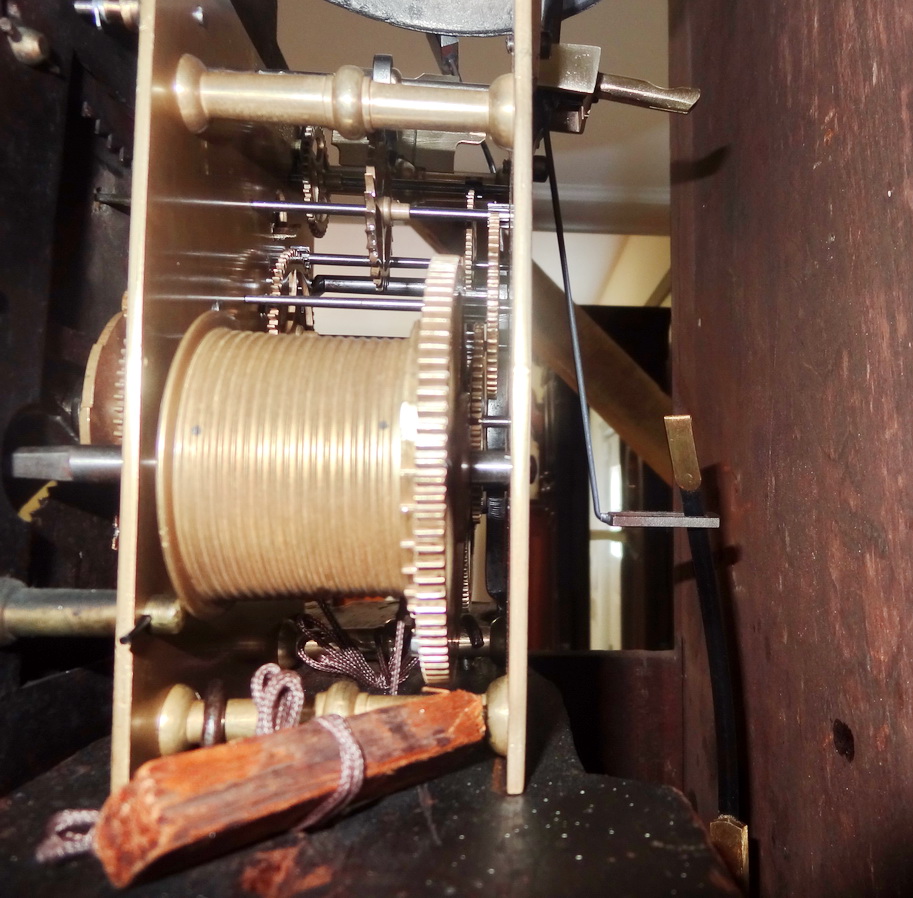
The Suspension spring needs to be threaded in the fork/slot on the back of the clock movement. Be CAREFUL NOT to bend the spring and NOT to bend the fork. Use 2 hands….. always support the weight of the pendulum while you thread the spring into the fork.
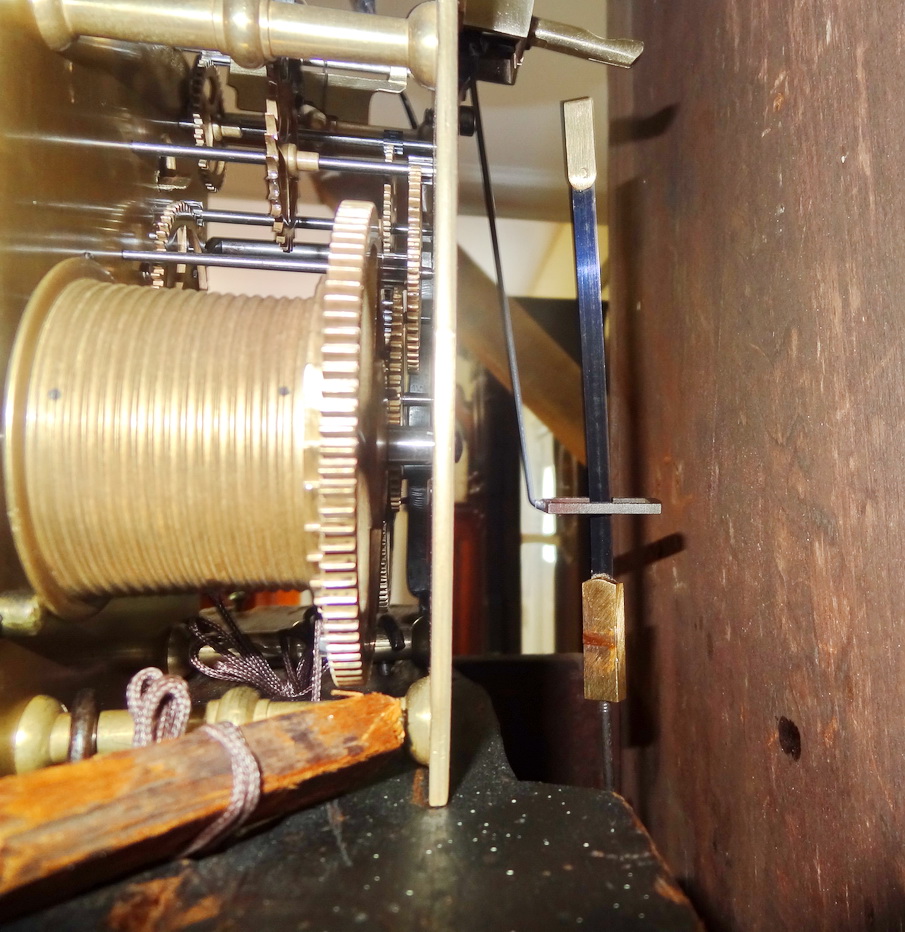
slowly guide the spring through the fork and then slide the edge of the spring into the notch on the post at the top of the movement

The brass post at the top has a “SLOT” in it and the thin blue/black part of the spring will slide into this slot. then the weight of the pendulum will be supported by the brass cap at the end of the spring. After proper installation, the spring is supported on the top with the spring properly fitted in the slot of the top brass post AND the brass block at the bottom end of the spring is within the metal fork of the movement.
6). Installing the weights
You will find a piece of bubble paper in the bottom of the case. Reach inside and remove it and protect the front of the base panel as shown

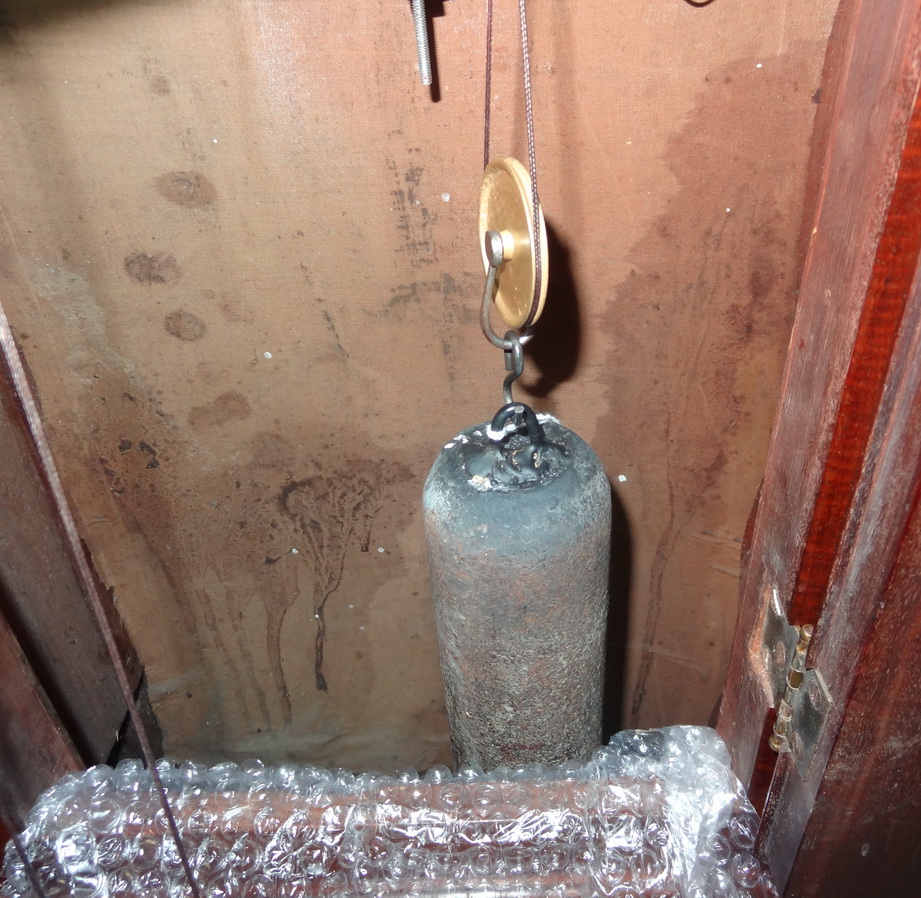
Remove the cords/pulleys and allow them to rest on the bubble paper
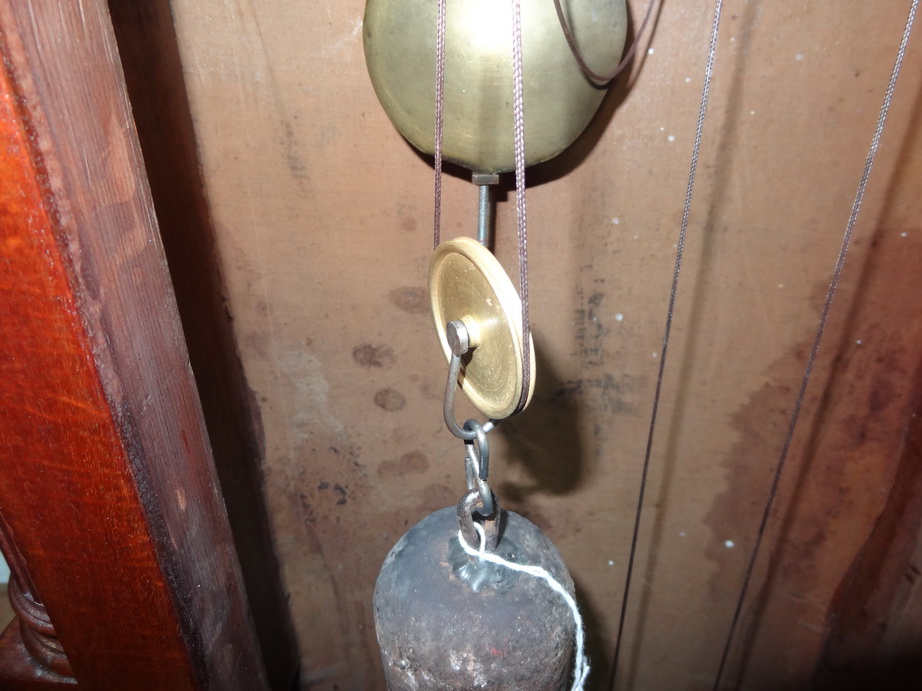
Align the weight cord into the groove at the outer edge of the pulley. place the pulley into the case and grip the cord that moves/winds upward into the drum with your hand.
Gently wind the clock until you can see the pulley. Make sure you hold the cord that winds up with finger pressure: index finger + thumb. Have a look from the side as you wind and make sure the cord is winding properly on the drum: No Crossovers, No tangles, nice tight spool on the drum. STOP winding when the pulley is approx. at the level of your waist. Then hook the weight Make sure the hands are NOT covering the winding hole.. If you need to move the hands…. ONLY move the minute hand, and ONLY move it clockwise just enough to clear the winding hole
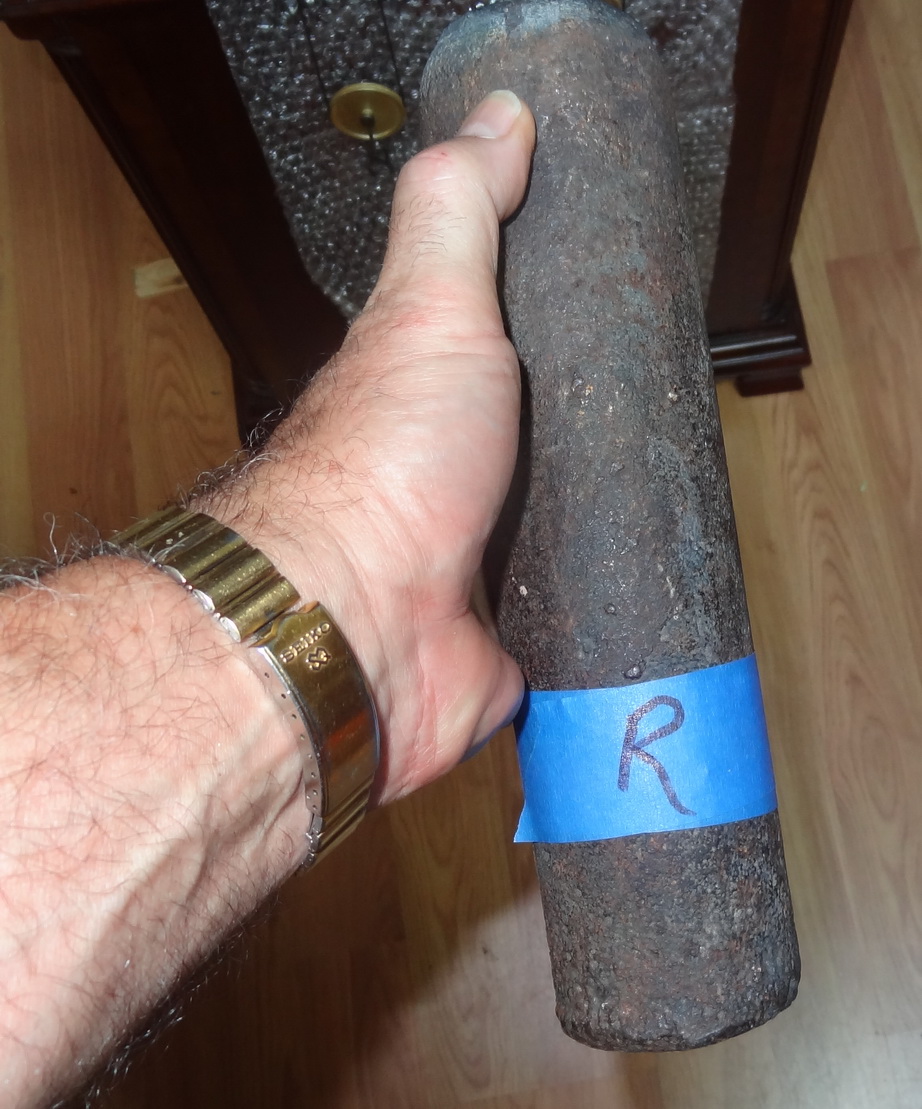
Each weight is marked… L/R Start with the Right side… Hold the weight with one hand, and with the other hand align the pulley and be sure that the cord is properly fit into the channel edge of the pulley. You must keep the weight/pulley/cord all perfectly aligned during these steps
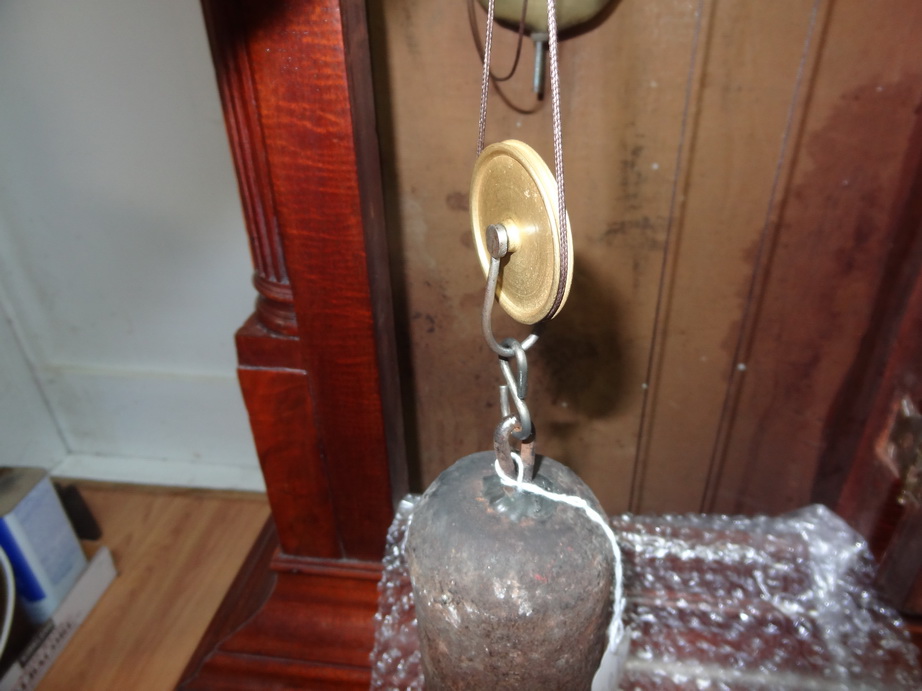
Keep the cord tight around the pulley, hook weight to the pulley. Using 2 hands… support weight and hold the cords tight to keep the cord from slipping off the pulley. This is very important. And the next step will be to put the weight in the case and you must do this by lifting the weight by the cords and placing the weight in the case, carefully lowering it while holding both cords together
lowering the weight into the case. keep the cords tight and aligned. You are holding the cords with your hand and carefully lowering the weight into the case
Repeat the process for the left side… Make sure the cords are properly fitted on the pulley
At this point you should have BOTH weights in the clock and the pendulum installed. You can start to gently wind the clock. Do this slowly and make sure the cords have not slipped off the pulley and the weights are properly supported by the cords before you do this.
As you slowly wind the clock… you will note that ONE cord is pulling the weight up. With your thumb and index finger, pinch this cord and keep a slight finger pressure on it as it winds. Wind it just enough to see the pulley and confirm that the cord is properly aligned on the pulley. Do both sides… As you do this…. Note from the SIDE that the cord is winding properly on the drum: NO TANGLES./ NO Cross threading…
Just wind it enough to make sure that you don’t have any issues with cords/pulleys/winding drums etc..
7). Start the clock..
Slide the bob to one side about 4-6 inches and let go. Pendulum should swing and the clock should tick. Confirm it is ticking/running… then leave it for a couple of minutes.
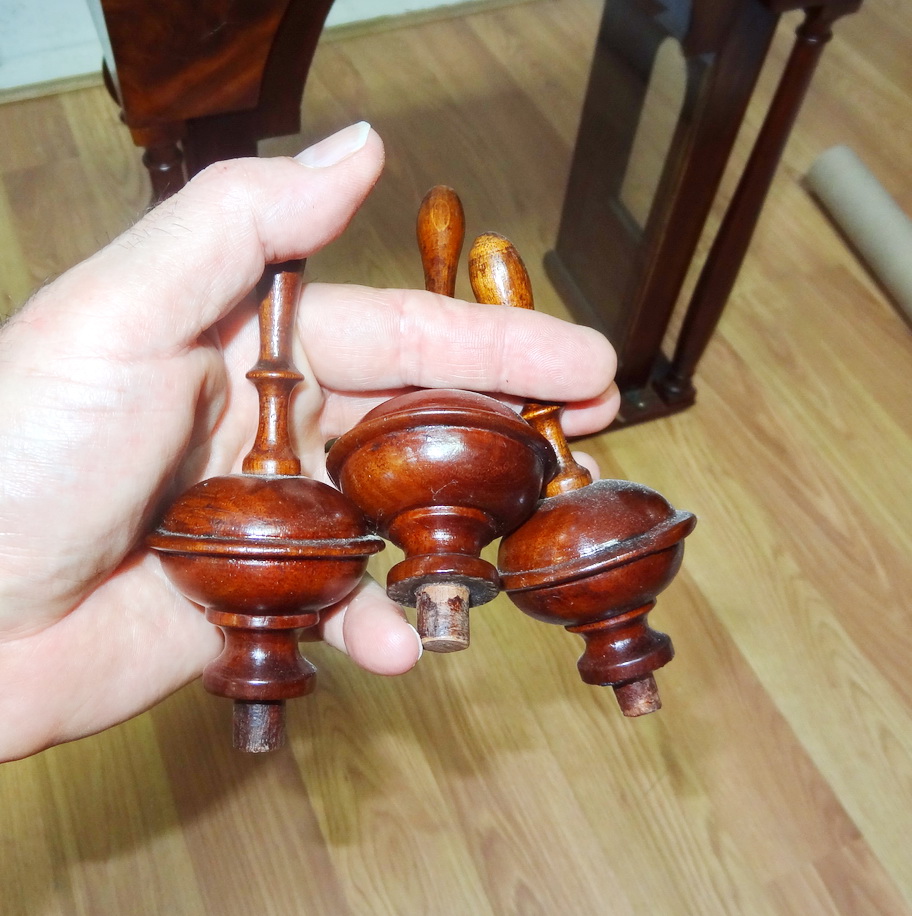
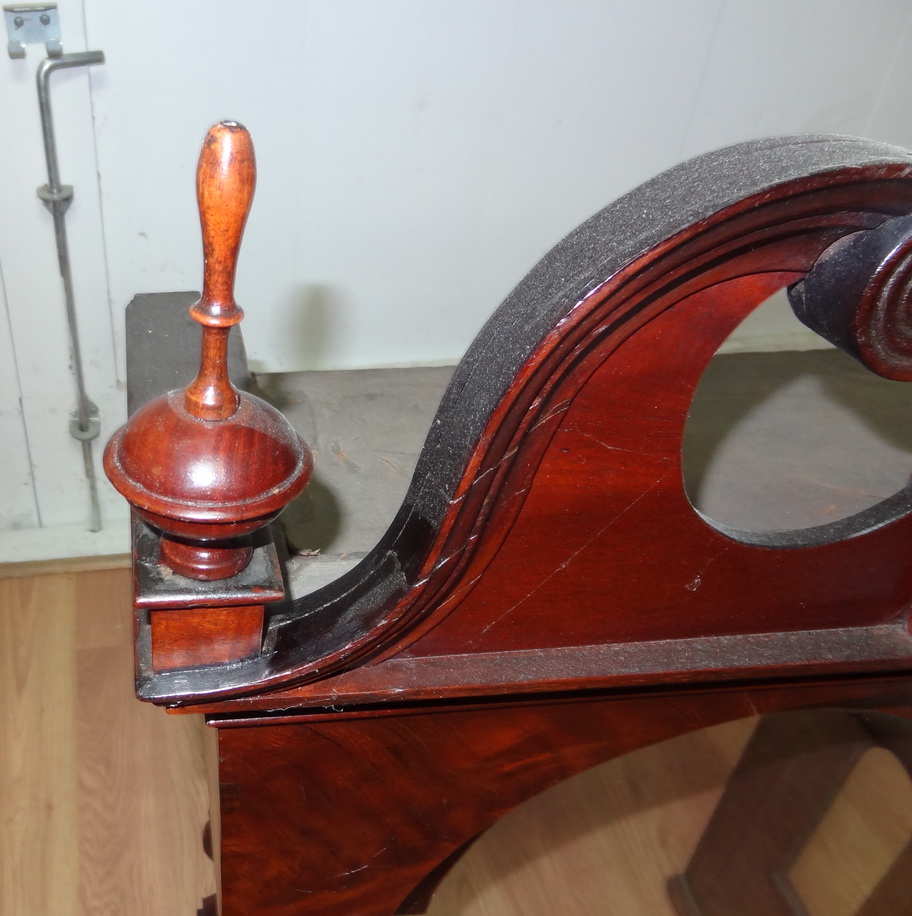
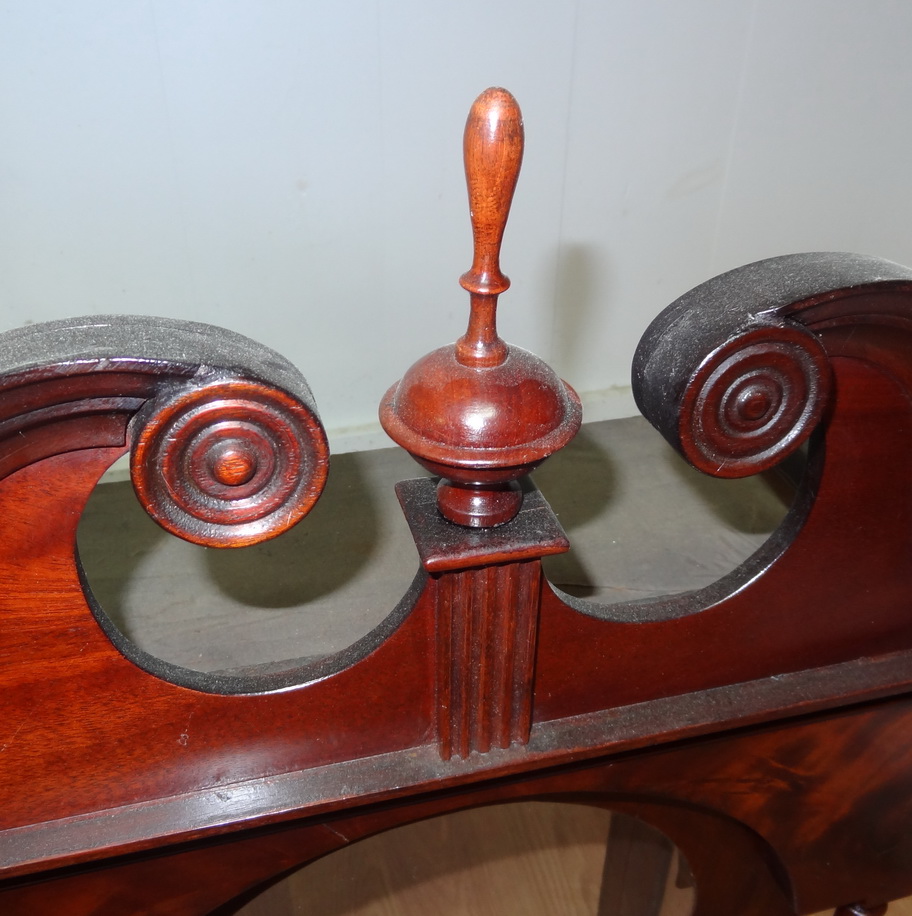
8). Install finials on bonnet

9). Go back to the clock… Assuming it is running ! Hopefully !
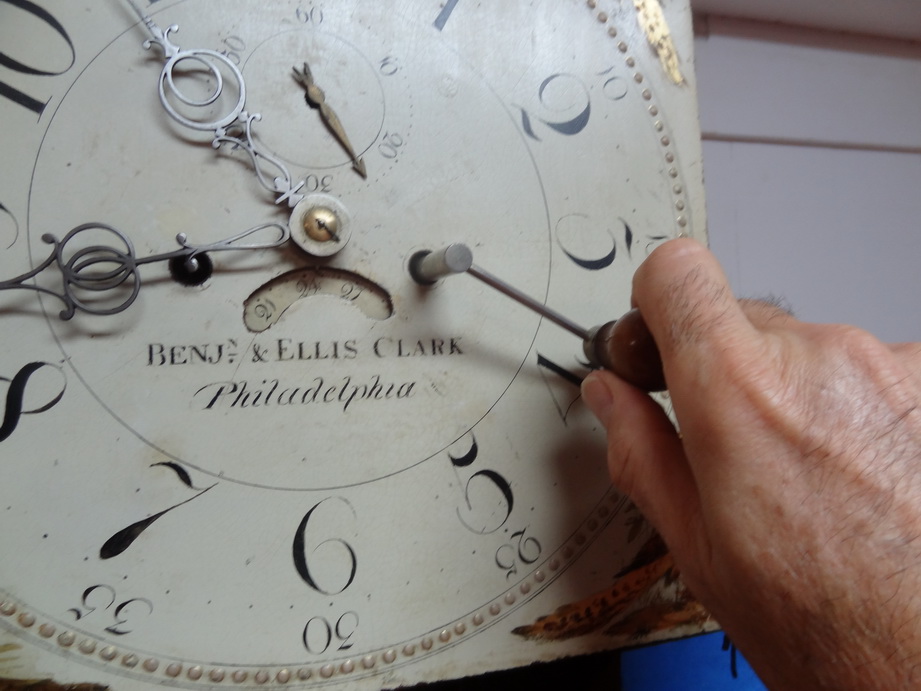
Set the time… ONLY move the minute hand and ONLY move it clockwise. Slowly !
When you get near 10 minutes before the hour move the hand even SLOWER and carefully listen for the “STRIKE WARNING” you will hear a “click” And then you STOP moving the hand and allow the mechanical warning fly to end.
Then move the minute hand until you reach the strike release and the clock begins to chime. Then STOP and allow the movement to strike. Don’t move the hand until the strike sequence has completed.
Repeat this process until you reach the correct hour… The set the correct minute.
Now you can wind the weights… be careful NOT to wind the weights too far where the pulley will touch the bottom of the seat board. Wind both weights to a safe level then put a piece of blue tape on the back as a guide for the owner not to wind past this line.
10). Put the bonnet on the clock.
The bonnet slides on the clock. Hold the bonnet with both hands, just above the top of the columns. With your left thumb, press on the door as you lift the bonnet, hold the bonnet, and slide the bonnet on the case. This will prevent the door from flying open while you install the bonnet.
11). Regulating the clock (for the customer)….
During transportation, the pendulum might have shifted. To make the clock run faster the bob needs to go up/higher. Faster = Up, Slower = Down.
Gently turn the rating nut at the bottom of the pendulum to adjust the position of the pendulum. Make small adjustments.
12). Winding the clock.. Once a week. Wind the clock using the procedure outlined above.
As you slowly wind the clock… you will note that ONE cord is pulling the weight up. With your thumb and index finger, pinch this cord and keep a slight finger pressure on it as it winds. Wind it and make sure you note the pulley and confirm that the cord is properly aligned on the pulley. Also inspect the cord every time you wind and make sure there is no abnormal wear/fraying Do both sides…
13). Stopping the clock. You can grab the pendlum, bring it to center and then release. If you are planning to be away on a trip, its a good idea to stop the clock rather than let it wind down.